


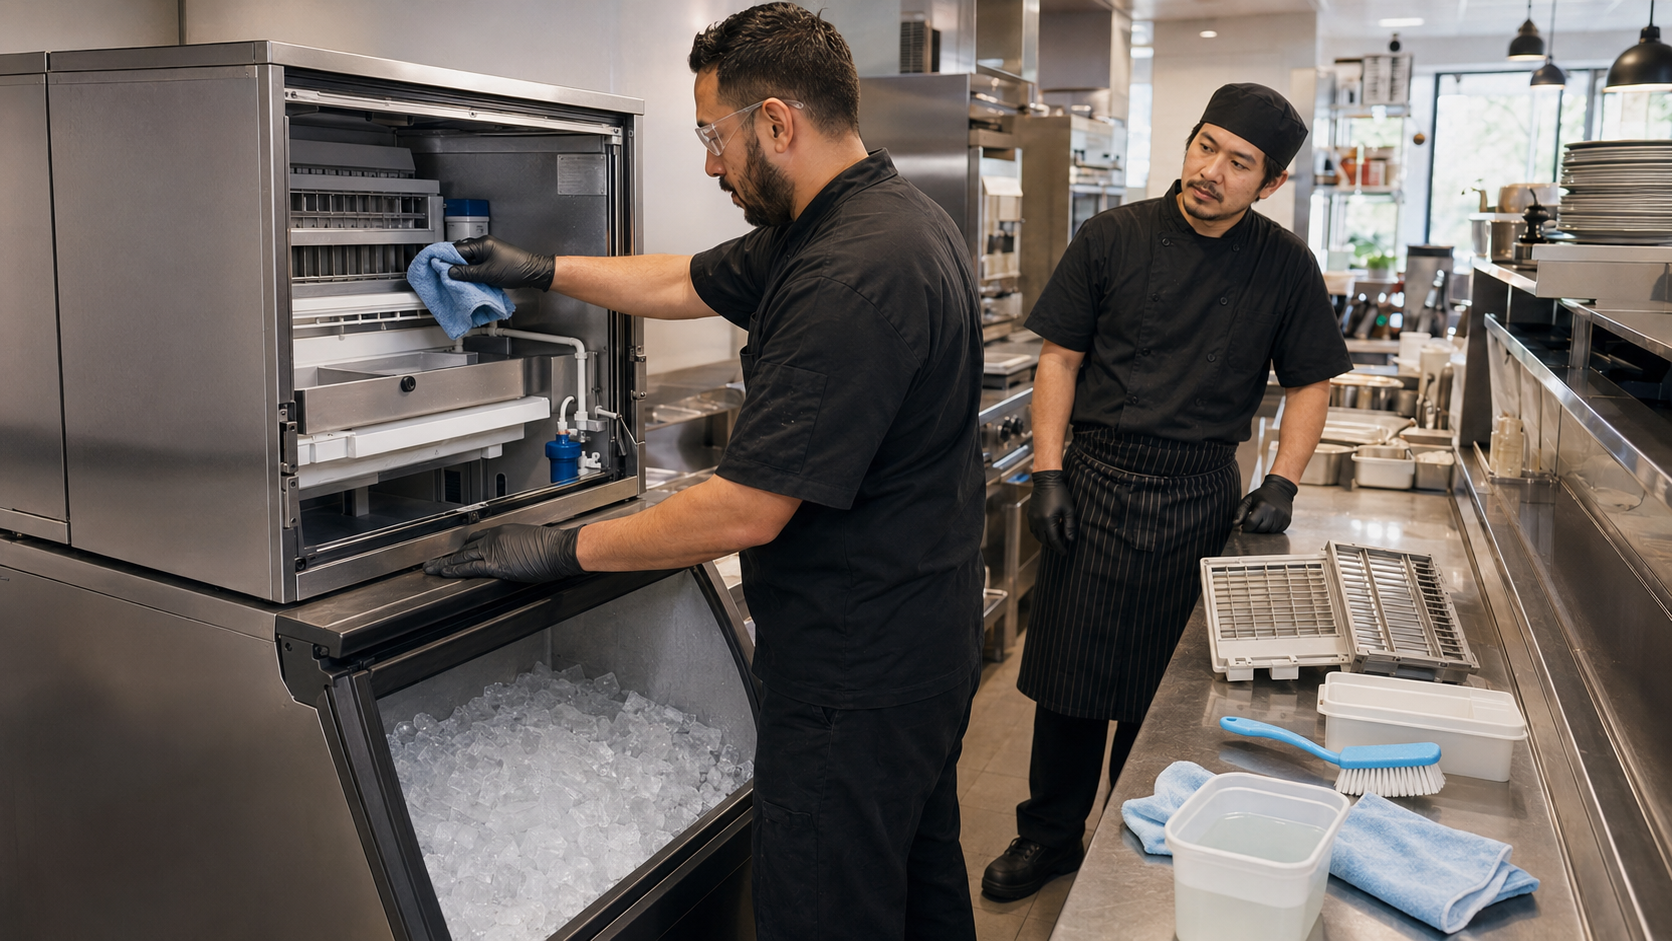
A commercial ice machine should generally be emptied, descaled, rinsed, sanitized, reassembled, and flushed before it returns to service. Many manufacturers recommend a complete cleaning and sanitizing at least every six months, but water quality, operating conditions, machine design, and local health requirements may make more frequent service necessary.
The exact procedure and chemical quantities vary considerably between brands and models. Always locate the manufacturer’s manual and model number before beginning. Never substitute household cleaners or copy a chemical ratio from another machine.
This guide explains the process shared by most commercial ice machines while identifying the steps that must be confirmed in your equipment manual.
Important: This is a general maintenance guide, not a replacement for the manufacturer’s instructions. Follow the manual, chemical labels, local health regulations, and applicable workplace safety procedures.
Why Commercial Ice Machines Need Regular Cleaning
An ice machine continuously brings together water, air, internal equipment surfaces, and human handling. These create several types of buildup.
Mineral scale
Water naturally contains minerals. As the machine freezes water, calcium and other minerals can accumulate on the evaporator, water trough, distribution tubes, probes, nozzles, and other internal components.
Scale may restrict water flow, interfere with ice release, reduce production, increase freeze times, and place unnecessary stress on the machine.
Slime and biofilm
Moist surfaces can support the development of slime or biofilm. These deposits may appear pink, brown, black, green, or translucent and commonly develop around:
- Water troughs
- Distribution tubes
- Curtain edges
- Bin seams
- Drain openings
- Dispenser chutes
- Overflow tubes
- Hard-to-reach corners
Running an automatic cleaning cycle alone may not remove buildup from the bin, chute, drain, or surfaces outside the circulating water system.
Dust, grease, and airborne contaminants
Air-cooled ice machines draw surrounding air across a filter or condenser. Machines located near cooking equipment may collect grease, flour, dust, and other airborne material faster than machines installed in a clean, temperature-controlled room.
A dirty condenser or restricted air filter reduces airflow and may lower ice production while increasing operating temperature and energy consumption.
Human contact
Bin doors, scoops, scoop holders, dispenser controls, and ice chutes are frequently touched. Even when the internal water system is clean, poor ice-handling practices can recontaminate the storage area.
NSF/ANSI 12 establishes sanitation-related requirements for automatic ice-making equipment intended to produce and store ice for human consumption. However, sanitary equipment design does not eliminate the need for proper operation, cleaning, and maintenance. Learn more about NSF food equipment standards.
Cleaning vs. Descaling vs. Sanitizing
These terms describe different processes and should not be used interchangeably.
| Process | Primary purpose | What it addresses |
|---|---|---|
| Washing | Removes loose soil, residue, and debris | Dirt, grease, dust, and visible residue |
| Descaling | Dissolves mineral deposits | Calcium, lime, and hard-water scale |
| Sanitizing | Reduces microorganisms on cleaned food-contact surfaces | Bacteria and other microbial contamination |
| Disinfecting | Uses a stronger labeled process for specified organisms and surfaces | Higher-level microbial control when required |
A descaler is not automatically a sanitizer. Sanitizer cannot reliably penetrate heavy mineral deposits or visible soil. The normal sequence is therefore:
Clean or descale → rinse → sanitize
Manitowoc, for example, states that its cleaner/descaler removes mineral deposits while its sanitizer addresses algae and slime. The manufacturer also warns operators not to mix the two products. Review Manitowoc’s cleaner and sanitizer guidance.
How Often Should a Commercial Ice Machine Be Cleaned?
Start with the schedule in your machine’s manual. The FDA Food Code says ice bins and enclosed ice-maker components should be cleaned at the frequency specified by the manufacturer—or, when no schedule is provided, often enough to prevent soil or mold accumulation.
The FDA Food Code is a model code rather than the law in every jurisdiction, so your local health authority’s requirements take priority. See Section 4-602.11 of the FDA Food Code.
Manufacturers do not all specify the same interval:
- Many Manitowoc manuals call for cleaning and sanitizing every six months.
- Scotsman commonly recommends descaling, sanitizing, and filter maintenance at six-month intervals, with more frequent service when conditions require it.
- Some Hoshizaki models specify cleaning and sanitizing at least once per year, while also noting that local water conditions may require more frequent cleaning.
- High-use dispensers, flake machines, nugget machines, and equipment in dusty or greasy environments may require shorter intervals.
A practical starting schedule is:
| Frequency | Recommended task |
|---|---|
| Daily | Inspect ice, bin, scoop, door, chute, and surrounding area; clean high-touch surfaces |
| Weekly | Inspect for slime, odors, scale, standing water, and slow drainage |
| Monthly | Inspect and clean accessible air filters, condenser area, bin, drain, scoop holder, and dispenser surfaces as needed |
| Every 3–6 months | Complete descaling and sanitizing when required by the manual or operating conditions |
| Every 6 months | Inspect or replace water filters according to filter capacity and manufacturer instructions |
| Annually | Professional inspection of mechanical condition, water system, refrigeration performance, drains, and electrical components |
| Immediately | Clean after contamination, extended shutdown, boil-water event, flooding, visible mold or slime, or a confirmed water-quality problem |
Use this only as an operating framework. The equipment manual, filter capacity, water quality, local regulations, and observed conditions determine the final schedule.
Signs an Ice Machine Needs Cleaning
Do not wait for a calendar reminder if you notice:
- Visible white or chalky mineral scale
- Pink, brown, black, or green residue
- Slime around the trough, curtain, bin, or drain
- Cloudy, soft, misshapen, or incomplete ice
- Unusual taste or odor
- Ice that sticks to the evaporator
- Longer freeze or harvest cycles
- Reduced daily ice production
- Overflowing or poorly distributed water
- Slow bin or dispenser drainage
- Excess heat around an air-cooled machine
- A dirty condenser or clogged air filter
- Repeated clean or service alerts
- Ice that breaks differently than usual
Poor production does not always mean the machine is dirty. High ambient temperature, warm incoming water, low water pressure, refrigerant problems, damaged components, and incorrect installation can produce similar symptoms.
What You Need to Clean a Commercial Ice Machine
Gather everything before shutting down production.
Required information
- Manufacturer
- Model number
- Serial number
- Installation, operation, or service manual
- Approved cleaner or descaler
- Approved food-equipment sanitizer
Cleaning supplies
- Chemical-resistant gloves
- Safety glasses or face protection
- Clean buckets
- Accurate measuring container
- Soft nylon brushes
- Clean disposable or dedicated cloths
- Nonabrasive pads approved by the manufacturer
- Towels for surrounding floors and equipment
- Flashlight
- Vacuum or soft condenser brush
- Replacement water-filter cartridge, if due
- Sanitizer test strips when applicable to the product
Use separate, clearly identified containers and tools for cleaner and sanitizer. Never mix chemicals.
Many ice-machine descalers contain acid. Chlorine-based sanitizers can release hazardous gases when mixed with acids or other incompatible cleaners. The CDC warns that chlorine bleach can release chlorine gas when combined with certain cleaning products. Review the CDC’s chlorine safety warning.
How to Clean a Commercial Ice Machine Step by Step

Commercial cube, nugget, flake, and dispenser machines operate differently. Button sequences, chemical quantities, cycle duration, removable parts, and rinsing requirements are model-specific.
The following sequence represents the general process.
1. Find the Manual and Read the Chemical Labels
Locate the model number on the machine’s data plate and download the correct manual. Do not rely solely on the logo on the front because a single manufacturer may use different cleaning procedures across product families.
Confirm:
- Which cleaner is approved
- Whether a nickel-safe or metal-safe cleaner is required
- The exact chemical quantity
- When to add the chemical
- Which components may be removed
- Whether parts can be soaked
- Required sanitizer concentration
- Contact time
- Rinsing instructions
- How many batches of ice must be discarded
- Whether the cleaning cycle requires electrical power
Do not begin by automatically unplugging the machine. Some machines need power to complete a wash or clean cycle. Follow the prescribed shutdown and cleaning sequence, then disconnect power before manual disassembly when instructed.
2. Schedule Downtime
Perform the cleaning when the operation can function without the machine. A complete cleaning may take several hours once ice removal, disassembly, soaking, sanitizing, reassembly, flushing, and new ice production are included.
If backup ice is necessary, obtain it from an approved source and store it in clean, food-grade containers away from the cleaning area.
3. Stop Ice Production
Use the machine’s control to stop ice production. Depending on the model, you may need to:
- Turn the machine off immediately
- Allow the current harvest cycle to finish
- Press a clean or wash button
- Move a control switch to wash or service mode
Waiting for ice to release naturally can protect the evaporator. Do not pry ice from an evaporator with a knife, screwdriver, or metal tool.
4. Empty the Storage Bin
Remove and discard all ice from the bin or dispenser. Do not return removed ice to the machine after cleaning.
Check underneath the ice for:
- Slime
- Scale
- Foreign objects
- Standing water
- Blocked drain openings
- Damaged bin liners
- Loose hardware
The bin must be completely empty before cleaners or sanitizers are introduced.
5. Run the Descaling Cycle
Start the manufacturer’s cleaning or wash cycle. Add the exact amount of approved ice-machine cleaner at the point specified in the manual.
The solution is normally circulated through the water system to dissolve mineral deposits from the evaporator, trough, pump, distribution system, and related components.
Do not:
- Estimate the chemical amount
- Increase the concentration to speed up cleaning
- Add cleaner too early
- Mix sanitizer into the cleaner
- Shorten the required cycle
- Use vinegar unless the equipment manufacturer specifically permits it
Too little cleaner may not remove scale. Excessively strong acid or frequent unnecessary descaling can damage metal surfaces and evaporator plating.
6. Shut Off Power Before Disassembly
Once the automatic cleaning cycle is complete, follow the manual’s instructions for turning off and electrically isolating the machine.
Close the water supply if required before removing water-system components. Be aware of sharp sheet-metal edges, moving parts, hot components, and electrical connections.
If safe isolation or component removal is unclear, stop and contact a qualified technician.
7. Remove Washable Components
The removable parts differ by design but may include:
- Water curtains
- Splash shields
- Distribution tubes
- Spray bars or nozzles
- Water troughs
- Overflow tubes
- Float assemblies
- Ice thickness probes
- Water-level probes
- Bin switches
- Chute covers
- Agitators
- Dispense rotors
- Drip trays
- Air filters
Take a photo before removal and arrange parts in order. Do not pull on wiring, scratch sensors, bend probes, or force plastic clips.
Only remove components identified in the manufacturer’s instructions.
8. Descale the Removable Parts
Prepare the cleaner at the concentration specified in the manual or product label.
Use a soft nylon brush or nonabrasive cloth to loosen deposits. Pay particular attention to holes in water distribution tubes, corners, seams, sensor surfaces, and areas where water flow changes direction.
Some components may be soaked for a specified period. Do not soak motors, electrical connectors, bearings, sensors, or components that the manual identifies as non-submersible.
Never use:
- Steel wool
- Wire brushes
- Metal scrapers
- Knives
- Abrasive powders
- Unapproved acid
- Oven cleaner
- Ammonia-based cleaner
Hoshizaki specifically warns against ammonia-type cleaners in some ice-machine manuals. Unapproved products may damage finishes, plastics, nickel plating, seals, or food-contact surfaces.
9. Clean the Interior Water System
Wipe or brush accessible areas that contact circulating water, following the manufacturer’s instructions.
These may include:
- Evaporator surface
- Water trough
- Distribution area
- Interior walls
- Ice guides
- Sensors
- Drain openings
Do not aggressively scrape the evaporator. Damage to its plated surface can cause poor ice release and require an expensive replacement.
10. Rinse Away the Cleaner
Rinse cleaned parts and internal surfaces with clean potable water as directed.
Acidic descaler residue must be removed before sanitizer is introduced. Cleaner remaining inside the water system can affect ice quality, damage components, or react with other chemicals.
Inspect the parts again after rinsing. If scale remains, repeat only the process allowed by the manual rather than increasing the chemical strength.
11. Wash the Storage Bin and Dispenser
The automatic cleaning cycle may not reach the storage bin, door, chute, or dispenser mechanism. Clean these areas manually.
Wash:
- Interior bin liner
- Underside of the bin door
- Door gasket
- Corners and seams
- Ice deflector
- Scoop holder
- Chute and chute cover
- Dispenser rotor or agitator
- Drip tray
- Drain opening
- Accessible drain surfaces
Remove visible soil before sanitizing. Sanitizer is not a replacement for physical cleaning.
Do not direct high-pressure water toward electrical components or allow excessive water to enter insulated walls or control areas.
12. Sanitize the Machine and Components
Prepare the approved food-contact sanitizer at the labeled concentration.
Apply it to previously cleaned:
- Water-system components
- Removable parts
- Bin interior
- Door and gasket
- Ice chute
- Deflector
- Scoop holder
- Other ice-contact surfaces
Keep surfaces wet for the required contact time. Use sanitizer test strips when the product label or operating procedure requires concentration verification.
Whether a sanitizer should be rinsed or allowed to air-dry depends on its label and the machine manual. “No-rinse” only applies when the product is used at the correct food-contact concentration.
Never combine cleaner and sanitizer or reuse a bucket that still contains acidic cleaner.
13. Reassemble the Machine
Allow parts to air-dry when required and reinstall them in the correct order.
Verify that:
- Curtains move freely
- Tubes and nozzles face the correct direction
- Probes are secure
- Float mechanisms move properly
- Hoses are connected without kinks
- Drain plugs are restored
- Electrical connectors are dry and secure
- No cleaning tools or cloths remain inside
- Panels are installed correctly
Incorrect assembly can cause water leaks, freeze-up, poor ice formation, or a no-ice condition.
14. Clean the Air Filter and Condenser
For an air-cooled machine, inspect the air filter and condenser separately from the food-contact cleaning process.
Remove dust and loose material with a vacuum, washable filter procedure, or soft brush as permitted by the manufacturer. Brush in the direction of the condenser fins and avoid bending them.
Greasy condenser coils may require professional cleaning. Avoid spraying water or chemicals into fans, motors, controls, or electrical compartments.
Water-cooled and remote-condensing systems have different maintenance requirements and may require a refrigeration technician.
15. Inspect the Water Filter and Drain
Replace the water-filter cartridge according to:
- Manufacturer interval
- Filter capacity
- Water consumption
- Pressure drop
- Local water conditions
- Scale formation
A filter does not eliminate the need to clean the machine. Filters are also not interchangeable: carbon filtration, sediment reduction, scale control, and reverse osmosis affect water differently.
Inspect drain lines for slow flow, slime, improper slope, leaks, or standing water. Never connect an ice-machine drain in a way that allows wastewater to backflow into the machine. Installation must comply with applicable plumbing and health codes.
16. Restart, Flush, and Discard Initial Ice
Restore the water supply and power in the order specified by the manual. Start the machine and watch at least one complete freeze and harvest cycle.
Check for:
- Water leaks
- Correct water distribution
- Unusual noise
- Proper ice release
- Normal cube shape
- Drain flow
- Error messages
Discard the initial ice production according to the manufacturer’s instructions. Some models require a specified operating time or multiple harvests before the ice can be used.
Never serve ice that may contain cleaner or sanitizer residue.
17. Record the Service
Document:
- Date
- Manufacturer and model
- Person completing the work
- Cleaner used
- Sanitizer used
- Concentration and contact time
- Condition of the evaporator and bin
- Filter replacement
- Condenser cleaning
- Drain inspection
- First ice discarded
- Problems discovered
- Next scheduled service
A cleaning log helps maintain consistency, train employees, support health inspections, and identify machines that are developing scale or biofilm faster than expected.
Cleaning Requirements by Ice Machine Type
Cube ice machines
Batch-type cubers commonly include an evaporator plate, water trough, distribution tube, curtain, and thickness or water-level controls. These components may be accessible to trained operators, depending on the model.
Protect the evaporator surface and reinstall curtains and probes precisely.
Nugget and flake ice machines
Continuous-type machines may contain augers, evaporator barrels, bearings, seals, breakers, and gearmotors. Scale removal can be more involved than on a cube machine.
Scotsman service information, for example, includes inspection of augers and bearings during maintenance on certain flake and nugget models. These procedures are often better assigned to a qualified technician.
Ice and beverage dispensers
In addition to the ice-making section, clean and sanitize:
- Dispenser chute
- Agitator
- Rotor
- Dispense wheel
- Sensors
- Drip tray
- Drain
- Splash zones
These components may require more frequent attention because they are exposed to hands, cups, beverage splash, and surrounding air.
Undercounter ice machines
The basic cleaning principles remain the same, but access can be limited. Confirm that the machine can be serviced without damaging its water, drain, or electrical connections.
Built-in undercounter units should not be pulled forward unless the utility connections permit it.
Common Ice Machine Cleaning Mistakes
Using the same chemical for every step
Descaler and sanitizer perform different jobs. Using one in place of the other leaves either mineral buildup or microbial contamination unaddressed.
Guessing chemical ratios
Concentrations differ between brands, machine types, and products. A ratio found online may not match your machine or chemical.
Mixing cleaner and sanitizer
Acidic descaler and chlorine-based chemicals can create dangerous reactions. Keep chemicals, measuring tools, and containers separate.
Cleaning only the storage bin
A clean-looking bin does not mean the evaporator, trough, pump, or water distribution system is free of scale.
Running only the automatic clean cycle
A clean cycle may not reach removable parts, bin seams, chute, drain, air filter, or condenser. Many machines still require manual disassembly and sanitizing.
Sanitizing over visible soil
Mineral scale, slime, and debris must be removed before sanitizer can make effective contact with the surface.
Using abrasive tools
Metal scrapers and wire brushes can damage evaporator plating and create scratches that become harder to clean.
Forgetting the first batch of ice
Ice produced during flushing may contain chemical residue. Follow the manual and discard the required initial production.
Returning removed ice to the bin
Ice exposed during cleaning can contaminate the freshly sanitized storage area.
Ignoring the source of recurring slime
Rapidly returning slime may indicate poor drainage, a contaminated scoop, dirty supply components, warm humid air, inadequate cleaning, or a location-related problem. Repeated growth requires investigation rather than more chemical.
How to Keep an Ice Machine Cleaner Between Deep Cleanings
- Wash hands before handling ice or the scoop.
- Never touch ice with bare hands or glassware.
- Store the scoop outside the ice or in an approved clean holder.
- Do not store bottles, food, towels, or tools in the ice bin.
- Keep the bin door closed.
- Clean handles and high-touch surfaces routinely.
- Inspect the bin and chute under bright light.
- Keep the area around the machine dry and uncluttered.
- Maintain clear ventilation around air-cooled equipment.
- Clean grease-producing equipment and hood systems regularly.
- Replace water filters on schedule.
- Correct slow or backing-up drains immediately.
- Record changes in ice quality and production.
- Clean and sanitize after extended shutdowns before returning the machine to service.
Water treatment can reduce scale, but the correct system depends on water chemistry and the machine manufacturer. Removing too many minerals can also affect ice formation on certain models, so water treatment should be selected carefully.
When to Call a Professional Technician
Stop and request qualified service when:
- The manual requires technical disassembly
- Electrical parts have been exposed to water
- The evaporator plating is peeling or damaged
- Heavy scale remains after the approved procedure
- Slime or mold quickly returns
- The machine leaks after reassembly
- Ice does not release correctly
- Production remains low after cleaning
- The unit shows recurring error codes
- The drain repeatedly backs up
- An auger, bearing, seal, pump, or motor needs inspection
- A water-cooled condenser requires service
- Refrigeration-system work is necessary
- You cannot verify that all chemical residue has been flushed
Cleaning cannot repair damaged components, incorrect installation, poor water pressure, refrigerant problems, or an undersized machine.

