

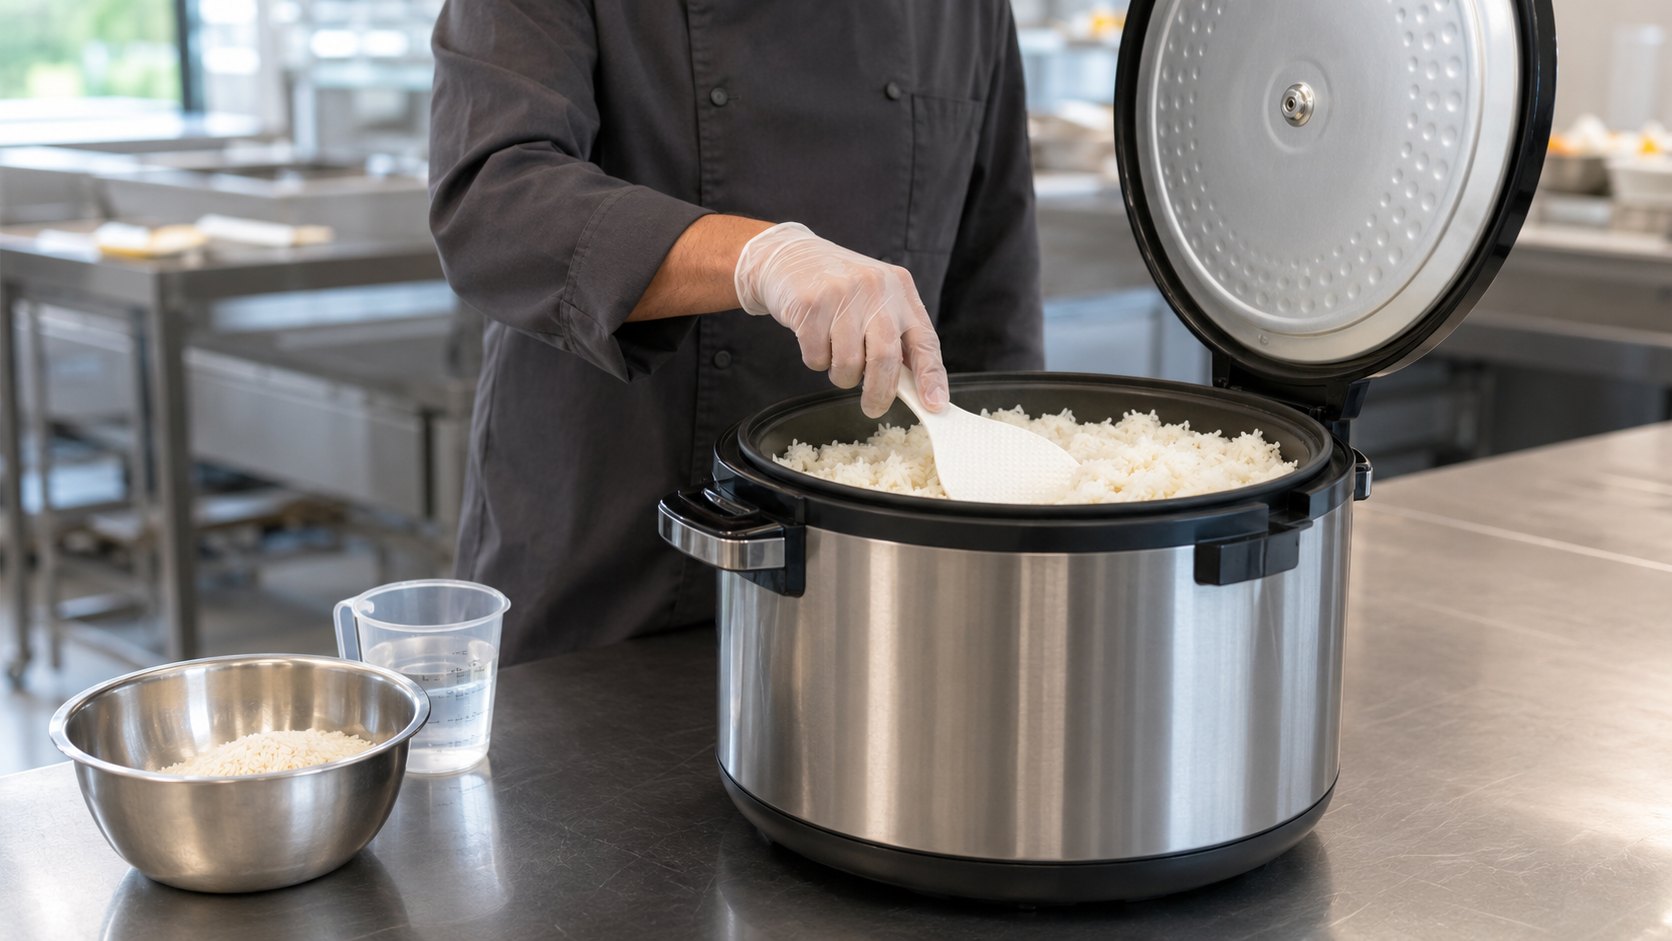
Using a rice cooker is simple: measure the rice, rinse it if appropriate, add the correct amount of water, close the lid, and start the cooking cycle. Once the cooker switches to “Keep Warm,” let the rice rest for 10 to 15 minutes before opening the lid and fluffing it.
That basic process works for most rice cookers, but the right water level, preparation method, and cooking time can vary depending on the rice variety and the machine. This guide explains how to cook consistently fluffy rice, prevent sticking and overflow, troubleshoot common problems, and safely manage large batches in a commercial kitchen.
What Is a Rice Cooker?
A rice cooker is an electric or gas-powered appliance designed to cook rice with minimal supervision. It heats rice and water inside a covered inner pot, allowing the grains to absorb the water while trapped steam completes the cooking process.
Basic electric rice cookers monitor the temperature of the inner pot. While liquid water remains, the temperature stays near its boiling point. Once most of the water has been absorbed or evaporated, the temperature begins to rise. The cooker detects this change and either shuts off or switches automatically to a warming mode.
More advanced models may include separate settings for white rice, brown rice, sushi rice, porridge, mixed grains, and quick cooking.
In restaurants, cafeterias, hotels, and catering operations, a commercial rice cooker helps produce repeatable batches while allowing kitchen employees to focus on other preparation tasks.
Before You Begin: Understand the Rice Cooker Cup
One of the most common rice-cooker mistakes happens before cooking even starts.
The measuring cup included with many rice cookers is not the same size as a standard U.S. measuring cup:
- One rice-cooker cup is usually 180 mL, or approximately ¾ of a U.S. cup.
- One standard U.S. cup is approximately 237 mL.
- The numbered water lines inside the inner pot are normally calibrated for the cup supplied with the machine.
For example, if you measure three level cups of rice using the included rice cup, add water to the appropriate “3” line inside the pot. Do not measure the rice with a standard cup and then use a water line calibrated for the smaller rice-cooker cup.
Manufacturers such as Zojirushi and Aroma specifically recommend using the measuring cup supplied with the appliance because it corresponds with the markings inside the inner pot. If the original cup is missing, check the owner’s manual before substituting another measurement.
How to Use a Rice Cooker in 10 Steps
1. Read the Manufacturer’s Instructions
Check which types of rice the cooker supports, its minimum and maximum batch sizes, and whether it has separate cooking settings.
The instructions and inner-pot water lines should take priority over a general rice-to-water ratio. Cooker design, heating power, batch size, and rice variety can all affect the amount of water required.
2. Measure the Rice
Use the measuring cup supplied with the rice cooker. Fill the cup and level the top rather than packing the rice or estimating the amount.
Do not exceed the cooker’s listed capacity. Rice expands considerably as it cooks, and overfilling the pot can cause foaming, overflow, uneven cooking, or damage to the appliance.
Rice-cooker capacity is normally stated in cups of uncooked rice. A 30-cup cooker, for example, may produce approximately 60 cups of cooked rice, although the exact yield depends on the rice variety.
3. Rinse the Rice When Appropriate
Place the rice in a separate bowl or in the removable inner pot, if the manufacturer permits rinsing inside it. Add cool water and gently move the grains with your hand. Drain the cloudy water and repeat until it becomes noticeably clearer.
Rinsing removes loose surface starch that can make some types of rice excessively gummy or cause the cooker to foam. It is particularly useful for long-grain white rice, jasmine rice, basmati rice, and many short-grain varieties.
Do not aggressively rub the grains together, as this can break them and release more starch.
Some enriched white rice contains vitamins and minerals applied to the grain’s surface. Washing it may remove part of this enrichment, so check the package before rinsing. Rice intended for risotto or other creamy preparations may also require different handling.
4. Drain the Rice Thoroughly
After rinsing, allow the rice to drain well. Water clinging to the grains becomes part of the cooking liquid and can make a carefully measured batch too soft.
Consistency is especially important in a restaurant. Use the same rinsing and draining method for every batch so employees do not produce different results from the same recipe.
5. Add the Correct Amount of Water
Place the drained rice in the inner pot. Set the pot on a level surface and add water to the line corresponding with the rice type and number of cups.
If the cooker does not have water lines, use the manufacturer’s ratio or the rice package instructions. Treat general ratio charts only as starting points.
6. Add Seasoning if Desired
Salt, oil, butter, broth, or approved seasonings can usually be added before cooking. A small amount of oil may also reduce sticking and surface foaming.
Avoid adding thick sauces, excessive fat, dairy products, or sugary ingredients unless the manual says the appliance can handle them. These ingredients can alter heat transfer, scorch on the bottom, or interfere with the cooker’s temperature sensor.
If using broth, remember that it may already contain salt. Keep seasoning measurements standardized in a commercial recipe.
7. Dry the Outside of the Inner Pot
Before placing the inner pot into the cooker, make sure its exterior is clean and completely dry. Rice grains, water, oil, or other debris between the pot and heating plate can interfere with heat transfer and may damage the unit.
Position the pot properly so it sits flat against the heating surface.
8. Close the Lid and Start the Cooker
Close and secure the lid. Select the correct program, if applicable, and press the start or cook control.
Do not open the lid or stir the rice during the cooking cycle. Opening the cooker releases heat and steam, which can leave the grains unevenly cooked. Stirring also releases additional starch and can create a gummy texture.
9. Let the Rice Rest
When the cooker changes from “Cook” to “Keep Warm,” leave the lid closed for approximately 10 to 15 minutes unless the manufacturer recommends otherwise.
This resting period allows moisture and heat to redistribute throughout the batch. It can make the difference between rice that is wet on top and firm on the bottom and rice with an even texture.
10. Fluff and Serve
Open the lid carefully, keeping your face and hands away from escaping steam. Fluff the rice gently with a plastic or silicone rice paddle.
Work from the bottom upward to redistribute moisture without crushing the grains. Avoid metal utensils, which can scratch a nonstick inner pot.
Rice-to-Water Ratio Chart
There is no universal ratio that works for every rice cooker. The most reliable method is to use the appliance’s supplied cup and matching water lines.
If your cooker does not provide a dedicated setting or water line, the following ranges can be used as test-batch starting points. Ratios are expressed as one volume of dry rice to the listed volume of water.
| Rice or grain | Starting rice-to-water ratio | Approximate cooking time |
|---|---|---|
| Long-grain white rice | 1:1.25 to 1:1.5 | 20–35 minutes |
| Jasmine rice | 1:1 to 1:1.25 | 20–30 minutes |
| Basmati rice | 1:1.25 to 1:1.5 | 20–30 minutes |
| Medium-grain white rice | 1:1.25 to 1:1.5 | 20–35 minutes |
| Short-grain or sushi rice | 1:1.1 to 1:1.25 | 25–35 minutes |
| Brown rice | 1:1.75 to 1:2 | 40–60 minutes |
| Parboiled rice | 1:1.75 to 1:2 | 25–40 minutes |
| Quinoa | 1:2 | 20–30 minutes |
These are not guaranteed settings for every machine. Rice variety, age, rinsing, soaking, elevation, desired texture, and cooker design can change the result.
For a new rice brand or recipe, prepare a small test batch. If the rice is too firm, add slightly more water to the next batch. If it is too soft, reduce the water. Record the successful measurement so the kitchen can repeat it consistently.
Should Rinsed Rice Use Less Water?
Rinsed rice retains some water on its surface. If the rice is not drained thoroughly, it may require slightly less added water than completely dry rice.
Rather than changing the ratio significantly, establish one consistent procedure:
- Rinse every batch the same way.
- Drain it for the same amount of time.
- Use the same measuring cup and water line.
- Adjust future batches in small increments.
This produces more reliable results than having employees estimate how much water remains on the rice.
How Long Does a Rice Cooker Take?
White rice commonly takes approximately 20 to 35 minutes in a rice cooker. Brown rice may require 40 to 60 minutes or longer because its bran layer slows water absorption.
Cooking time can also depend on:
- The type and quantity of rice
- Whether the rice was soaked
- The starting temperature of the water
- The cooker’s wattage or burner output
- The selected cooking program
- The altitude
- The machine’s recovery time between batches
Large commercial rice cookers do not necessarily take proportionally longer than small household units. Their higher output is designed to cook larger batches efficiently. Always use the model’s rated cooking time when planning restaurant production.
Do not judge the rice only by the timer. Allow the cooker to complete its automatic cycle and include the resting period in your prep schedule.
Should You Soak Rice Before Using a Rice Cooker?
Most everyday white rice does not need to be soaked unless the package or recipe calls for it. However, soaking can help certain grains hydrate more evenly.
Basmati rice is often soaked for 20 to 30 minutes to encourage longer, more separate grains. Some short-grain rice may also benefit from a brief soaking period. Brown rice can sometimes be soaked to improve texture and shorten cooking time, although results vary by machine.
If you soak rice, drain it and use the cooker’s recommended instructions. Pre-soaked rice may need less cooking water because it has already absorbed moisture.
How to Keep Rice from Sticking to the Rice Cooker
Some sticking at the bottom of the pot can be normal, especially in basic cookers. To reduce it:
- Rinse off loose surface starch.
- Measure the water accurately.
- Add a small amount of neutral oil if appropriate.
- Let the rice rest before fluffing.
- Fluff the rice soon after the resting period.
- Use a clean, undamaged inner pot.
- Avoid leaving a small amount of rice on “Keep Warm” for an extended period.
- Never scrape a nonstick pot with metal utensils.
A badly scratched or worn inner pot can cause more sticking and may need to be replaced.
Rice-cooker liners or reusable rice napkins may simplify cleanup in some high-volume operations, but use only accessories approved for the cooker. An unsuitable liner can block heat transfer or interfere with the temperature sensor.
Rice Cooker Troubleshooting Guide
Why Is My Rice Mushy?
Mushy rice usually means the batch contained too much water or was not drained sufficiently after rinsing.
For the next batch:
- Reduce the water slightly.
- Drain rinsed rice more thoroughly.
- Verify that employees are using the correct measuring cup.
- Check that the rice type matches the selected setting.
- Avoid exceeding the cooker’s maximum capacity.
Once rice is severely overcooked, it cannot be returned to a fluffy texture. It may still be suitable for congee, soup, rice pudding, or another recipe where a softer consistency is acceptable.
Why Is My Rice Hard or Undercooked?
Hard rice generally needs more water, more cooking time, or a longer resting period.
If the current batch is only slightly firm, add a small amount of hot water, close the lid, and run an additional short cooking cycle if the manufacturer allows it. Let the rice rest before checking it again.
Repeated undercooking may indicate:
- Too little water
- A loose or improperly closed lid
- Opening the lid during cooking
- A batch below the cooker’s minimum capacity
- Debris between the inner pot and heating plate
- A damaged heating element or temperature sensor
Why Is the Rice Cooker Bubbling Over?
Overflow is often caused by excess starch, too much water, overfilling, or using an unsuitable rice variety or ingredient.
To prevent it:
- Rinse the rice when appropriate.
- Stay below the maximum fill level.
- Use the correct rice and water measurements.
- Keep the steam vent clean.
- Avoid excessive oil, milk, broth, or starchy additives.
- Confirm that the inner lid and steam components are installed properly.
Never cover or obstruct the steam vent.
Why Is the Bottom of the Rice Burning?
A thin golden layer can develop in some cookers, particularly gas models. Heavy burning, however, may result from too little water, extended warming, a damaged pot, food stuck to the heating plate, or a malfunctioning thermostat.
Clean and inspect the appliance after it cools. If burning continues despite correct measurements and operation, discontinue use and have the unit evaluated.
Why Is the Rice Too Wet on Top and Dry on the Bottom?
The batch may not have rested long enough or may have been loaded unevenly. Leave the lid closed for 10 to 15 minutes after cooking, then fluff the entire batch from the bottom upward.
Also make sure the cooker is level and the inner pot is seated correctly.
How to Use a Commercial Rice Cooker

The cooking principle is similar, but commercial rice production requires greater attention to portioning, batch records, holding temperature, and equipment capacity.
Match Capacity to Demand
Choose a cooker based on uncooked capacity, cooked yield, batch frequency, and peak service demand. A machine that is too small may force employees to run continuous batches. An oversized cooker may perform poorly when used below its minimum recommended load.
If rice is central to the menu, using separate cookers for production and backup can prevent service interruptions.
Standardize Every Batch
Create a written recipe that identifies:
- Rice brand and variety
- Exact dry-rice measurement
- Rinsing procedure
- Draining time
- Water measurement
- Seasoning quantities
- Cooking program
- Resting time
- Expected cooked yield
Changing rice brands can change water absorption and finished texture. Test the new product before using it during service.
Do Not Use “Keep Warm” to Cook Rice
The warming setting is designed to maintain properly cooked rice, not finish an undercooked batch or reheat refrigerated rice. Use the cooking cycle for cooking and an approved rapid reheating method for previously cooled rice.
Rotate Batches
Label batches by production time and follow a first-in, first-out system. Avoid repeatedly mixing fresh rice into an older batch, as this makes holding time and quality difficult to monitor.
Rice Cooker Food Safety for Restaurants
Cooked rice requires careful temperature control. Uncooked rice can contain spores of Bacillus cereus. These spores may survive cooking and grow if cooked rice remains at unsafe temperatures. Some toxins produced through improper handling may not be eliminated by reheating.
Under the FDA Food Code, which is a model used by many state and local authorities:
- Cooked food being hot-held should generally remain at 135°F or above.
- Cooked food should cool from 135°F to 70°F within two hours.
- It should then cool from 70°F to 41°F or below within the next four hours.
- Food reheated for hot holding generally must reach 165°F for 15 seconds, with the reheating process completed within two hours.
The FDA recommends shallow pans, smaller portions, rapid-cooling equipment, ice baths, or other effective methods rather than cooling a deep container of rice at room temperature. Review the FDA’s cooling guidance and follow your local health department’s requirements, which may differ.
Do not leave cooked rice in a switched-off cooker overnight. A closed cooker can remain warm for a long time while still allowing the rice to pass through unsafe temperatures.
How to Clean a Rice Cooker
Always unplug an electric rice cooker and allow it to cool before cleaning. Shut off the fuel supply to a gas unit as directed by the manufacturer.
- Remove the inner pot, inner lid, condensation collector, and other washable parts.
- Wash removable components with warm water and an appropriate detergent.
- Use a nonabrasive sponge to protect nonstick surfaces.
- Clear residue from the steam vent.
- Wipe the exterior and heating plate with a damp cloth.
- Remove any grains stuck near the temperature sensor.
- Dry all parts completely before reassembly.
Never immerse the cooker body, electrical cord, plug, burner assembly, or heating base in water. Do not pour water directly into the cooker body.
For commercial equipment, follow the manufacturer’s cleaning instructions and the kitchen’s established cleaning and sanitizing procedures.
